

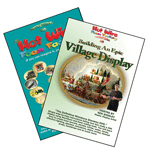

Village Landscaping 101
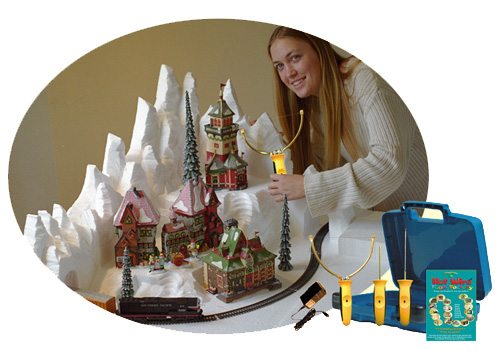
The Basics - 5 Easy Steps
1) Materials: We recommend using 2" thick pieces of polystyrene foam. A convenient size is 16"x24". These can be cut to smaller sizes or glued together - we recommend our Foam Fusion glue because it is solvent-free and will not dissolve foam over time like other glues. Paint with water based paints. Hot Wire Foam Factory's specially formulated Foam Coat adds a rocklike finish to the foam, and fills in gaps and mistakes.
2) Terraced Hills: Lay two whole pieces next to each other to make a 32"x24" base. Then lay another on top of these two in the far right hand corner to create a second level. Then cut a third piece in half using the Hot Knife, and stack these two pieces on top of each other, also in the far right hand corner, creating the third level. Roughly layout your village. Make cut-outs in the edges of the layers to make room for each of your village pieces. Lift each layer off the set when cutting.
 3) Mountains: Cut another piece of foam longways into 7" and 9" strips. Draw jagged mountains to be used as a dramatic backdrop for your village. Remember to use water based pens, or a pencil. Cut them out with the Hot Knife or Sculpting Tool. The 9" strip will go behind the 7" strip. You will have to cut these strips to match the lengths of each layer. This will add to the natural beauty, as you will have very tall mountains in the back corner, which follow the terraces down to the base level.
4) Gluing: You can use either our Foam Fusion glue, which is solvent-free and will not dissolve foam over time like other glues or you can use a low temperature hot glue gun to glue all of your pieces in place. Be careful not to get the hot glue too close to the edges where you will be cutting, because the glue will really slow down the blade when you are sculpting. After it's all glued together it will be very strong, but still super light. See the section on lighting before you glue your pieces together.
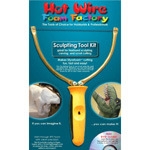
5) Sculpting: Now use the Hot Wire Sculpting Tool to add natural contours to the mountains, hills and valleys. Experiment on some scrap foam. Slice back and forth and in and out. Often the more sloppy you cut, the more realistic the terrain looks. Put the arms of the Sculpting Tool 3" apart and make an outward loop in the wire to cut your valleys. Let the heat of the wire do the cutting - if you try to push the wire down too fast you will lose your loop.
Advanced Techniques
"If You Can Imagine It, You Can Make It"
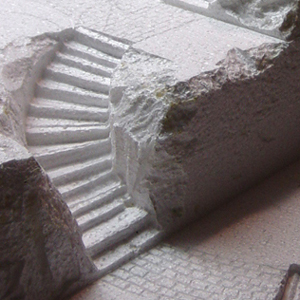 1) Stairways: Make an outward loop in the wire of the Sculpting Tool or Freehand Router, then square off the end to match the width of your stairwell. Starting at the top of your piece of foam, let the squared off end of the Hot Wire sink down the desired depth of a stair, then pull outward the desire length, then down, then outward until you complete the stairway and stairwell. Now just pull out the plug of foam. Try making a curved stairway or stairwell.
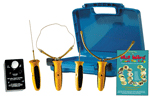
2) Roads, Walkways & Retaining Walls: The Hot Wire Engraving Tool is made specifically to create the look of brick, cobblestone, or block. Draw a light line around the perimeter of the area you want to look like brick or cobblestone. Then lightly drag the Engraving Tool across the surface of the foam in the pattern of cobblestones or bricks. You can use a wooden or metal straightedge as a guide for brick or block work. Use your imagination for making interesting stone patterns. You can use the Hot Knife for this too, but it is more difficult to control.
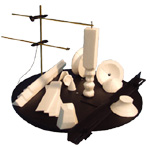
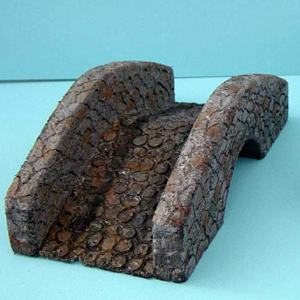 3) Walls & Bridges: Using the Sculpting Tool, or Hot Knife, slice off a 1/2" x 16" piece of foam. Using the Engraving Tool, or tip of the Hot Knife, engrave a stone pattern as you did with your roads, walkways, and retaining walls above. These can be used as walls or bridges. Enhance the bridge's look by cutting simple arches to place under the bridge. Try making pillars to put between sections of the walls.
4) Tunnels & Portals: Use the Hot Knife or Sculpting Tool to cut out a tunnel from a 2" thick by 8" high by 5" wide piece of foam. Glue several of these pieces of foam together to make a deeper tunnel. Use a taller piece, and sculpt the top to blend in with the mountain backdrop you have already created. Use the Engraving Tool or Hot Knife to engrave a stone pattern on the front face of the tunnel, to create a tunnel portal. The first layer of stone usually radiates out to form an arch.
5) Lighting: Before gluing the layers together, layout your village pieces. Mark where the wires for the lights need to be dropped through the foam. Remove the village. Using the Hot Knife (the Engraving Tool works too, but it's slower going.), cut a hole through the first layer of foam. This will also mark the spot to cut the layer underneath. Follow this procedure until the holes go all the way through. Be sure the holes are wide enough to get the plug or light fixture through before gluing. Most of the holes can be hidden under the village pieces. After gluing all the pieces together, turn the whole landscape on its side and carve grooves for the wires to go out the back. The alternative is to make 1/2" foam legs to hold the landscape up so the wires can go underneath.