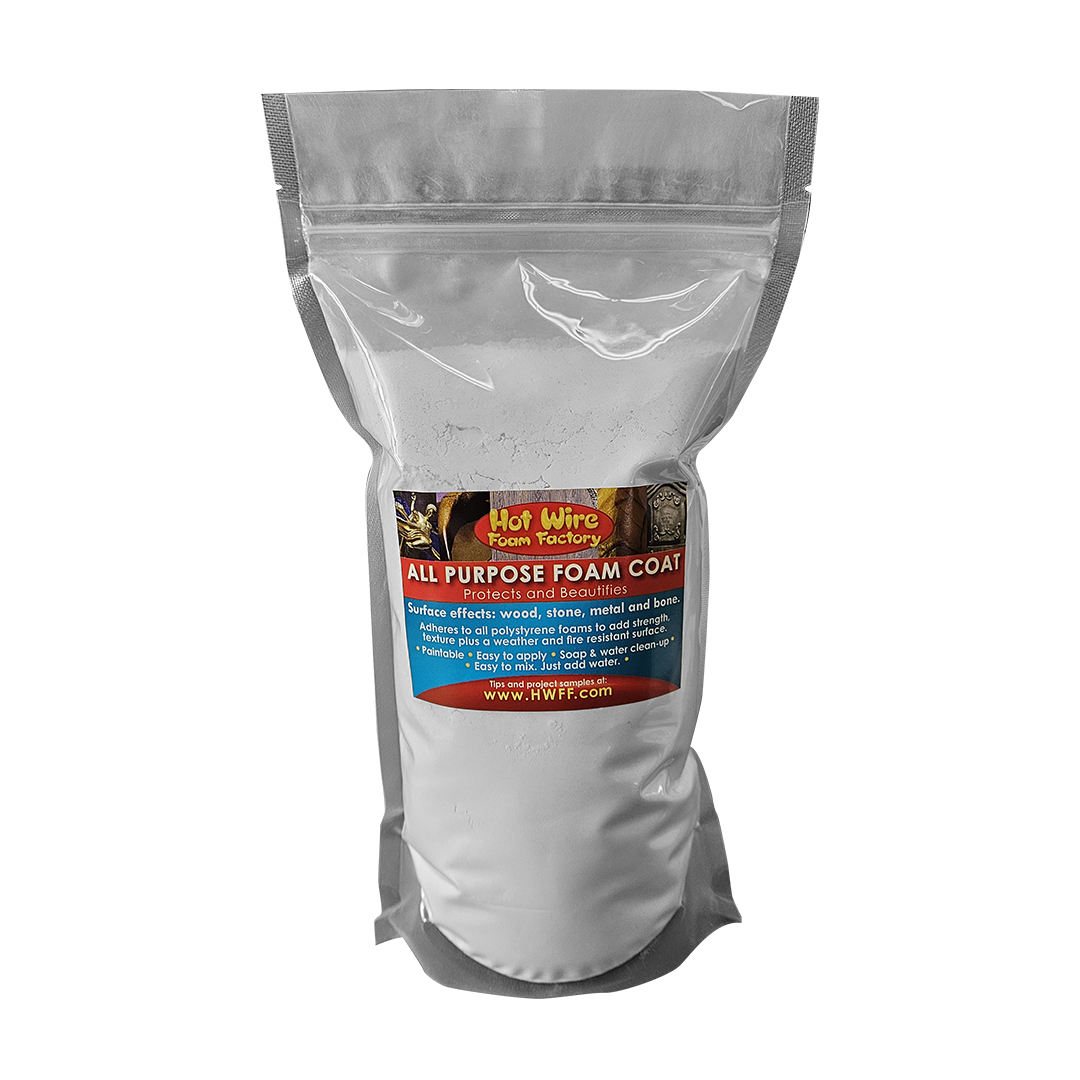
All Purpose Foam CoatRock hard concrete-like coating that protects and beautifies your foam projects!Easy to use - simply mix with water. It's tough yet still sandable. It is inherently fire resistant. Can be used outdoors when sealed with any outdoor paint, or mixed with Boost liquid fortifier, or Bounce liquid rubberizer. Apply thick with a trowel or thin with a paintbrush. Sets up in only about 15 minutes. Extend the drying time by adding up to 50% latex paint with your water before mixing into the dry foam coat.
Save money when buying 25lb bulk boxes in the US!Check out our bulk listing with a fixed shipping price included: *Please note 25lb boxes ship separately from other products ordered. Orders of 20 or more 25lb boxes may ship on a pallet. For volume discount rates of 40 or more 25lb boxes, email us. For a comparison of Foam Coats, click here To see foam projects made using this product, click here Features:
  Used For:
  Instructions:Download the instruction manual here.
MIXING: Settling may occur in shipping causing a gritty texture that does not stick well. Remix if there is separation in dry mixture. Remove or break up any clumps. Use when temperatures are between 40°F (4°C) and 100°F (38°C). Mix in a clean container with clean water. Use 1 part cool water per 3 parts of powder (for example, 1 cup of water per 3 cups of powder). Add water to powder and mix until Foam Coat turns to a smooth paste. Add more powder or water as needed for your application. A drier mix is stronger. If you add Boost or Bounce, a wet mix is stronger. Do not over mix, or separation can occur. You can add powdered or water based cement pigments while mixing in the wet ingredients.
APPLYING: Fill big cracks and holes by applying pasty mixture with a trowel. If using extruded foam (ie Blueboard or Pinkboard) roughen surface with coarse sandpaper. Apply with a paint brush, stucco brush, trowel or hopper gun. Use thinned mixture to texture large areas. For best strength apply at least 1/4” (6mm) thick. Multiple coats may be applied. Brushing or spraying a thin first coat, called a scratch coat, will make the next coat much easier to apply. Try texturing surface as the coating sets. CURE TIME: Working time of 10-20 minutes. Reaches full strength in 12-24 hours, depending on temperature and humidity. Add up to 50% latex paint to the water to extend drying time to 40-50 minutes. FINISHING: Remove dust before painting. This product goes on smooth and can be sanded. Can be used outdoors if sealed with paint. Add Grit texturizer to create a rock-like surface effect. CLEAN-UP: Clean tools and brushes with clean soapy water before coating hardens. If you add Boost, don’t leave any residue as it will be impossible to clean after it dries.   Additional Info:
WARRANTY: HWFF Inc./dba Hot Wire Foam Factory warrants this product to be of merchantable quality when used or applied in accordance with the instructions herein. The product is not warranted as suitable for any purpose or use other than the general purpose for which it is intended. Liability under this warranty is limited to the replacement of its product (as purchased) found to be defective, or at the shipping companies’ option, to refund the purchase price. In the event of a claim under this warranty, notice must be given to The Hot Wire Foam Factory in writing. This limited warranty is issued and accepted in lieu of all other express warranties and expressly excludes liability for consequential damages. MSDS available.
⚠️ California Proposition 65 Warning: This product contains crystalline silica, a chemical known to the State of California to cause cancer, birth defects, and reproductive harm. While mixing the dry ingredients use a dust mask or respirator with an RPE of 20 or 40. For more information, go to www.P65Warnings.ca.gov or HWFF's information page: California Proposition 65.   |
What is the difference between the foam coatings?
Here's a brief rundown on all of our coatings:
Styroplast is a brush-on plastic coating. This is the best coating for retaining detail. It is the best brush on Polyurethane coating on the market. Use our syringe for accurately mixing small batches.
All Purpose Foam Coat is the easiest to use and quick drying coating. It is mostly for indoor use, but can be sealed for outdoor use. Melanie, who made the Foam Gone Wild DVD, has used our All Purpose Foam Coat, and occasionally Exterior Foam Coat, for animal enclosures in a zoo for many years.
Create Coat is a lot like All Purpose Foam Coat, but a little stronger, waterproof, smoother and whiter. It does not stick very well to itself because it is so smooth and waterproof, so you can't layer it unless you add Boost to it. It takes acid and water base stains better than any coating we have seen, especially when used in combination with our Stainfast stain base.
Exterior Foam Coat is stronger than All Purpose and Create Coat. It can be used in rain-or-shine and even below grade. It is gritty, but can be troweled smooth. It takes 24 hours to harden and 5 days to reach maximum strength. Works very well with Stainfast stain base.
Boost liquid fortifier can be added to any of the powdered coatings to greatly increase their strength. It will also make them stick to almost any surface. If Foam Coat with Boost dries on your metal tools you won't be able to chisel it off with a hammer, it's that tough.
Bounce can be used only with All Purpose Foam Coat, to make it chip resistant. Or, you can make a super rubbery coating that still looks and feels like stone by adding small amounts of All Purpose Foam Coat to the Bounce to get the consistency you need.
Grit is used to add surface texture to All Purpose Foam Coat and Create Coat. It is sometimes used with Styroplast, too. It can be mixed in or worked into the surface.
Mesh will greatly increase the strength of any of our foam coats. Especially useful across seams where cracking might occur. Available in heavy and medium thicknesses.
StainFast is a fantastic new sealant that is used to stain and seal Exterior Foam Coat and Create Coat. You can use StainFast with water based pigments, or if you just want to seal the Exterior Foam Coat or Create Coat you can just use it as an invisible sealer. Unlike all other sealers, it does not look at all shiny, so you are able to retain the utmost realism. If you want to mix in pigments for staining (so that it looks like real stone) it will work great with the Exterior Foam Coat and give the best stone look and feel, but colors will be brighter when used on Create Coat.
Use our customizable comparison guide to help you choose the right foam coat for your project. Just check the Compare Selected button on the foam coat you are interested in. After looking through your options here, don't hesitate to email or call us with further questions.
Our coatings have fibers and polymers that greatly increase their strength and adhesion. Products like drywall mud, that are not made to work with foam, will easily chip off. Here is more information on gluing and coating foam:
http://gallery.hotwirefoamfactory.com/faqs/faqs-gluing-and-coating/
Happy foam coating!
Can you coat All Purpose Foam Coat with metal impregnated resins?
Yes, that should be fine. I haven't heard of it reacting to anything. It is very inert. But it's always a good idea to make a small test first on a scrap piece.
Just wondering if you might be able to tell me if your All Purpose Foam Coat offers enough protection to allow spraying a coated polystyrene object with aerosol paint? Many thanks, Laurie
Hi Laurie,
Yes, even a thin layer of All Purpose Foam Coat will protect your foam from the solvents in spray paint. Just make sure there is no foam showing.
Could these coatings be used over paper mache? Keeping them protected from mold/water and making more durable?
We have customers who have used All Purpose Foam and Exterior Foam Coat over paper mache and reported good results. But make sure that the piece is porous by splashing some water on it. If the water leaves a dark spot it is porous enough for any of our foam coatings to stick. If it is not porous, then you can add Boost to our All Purpose, Exterior, or or Create Coat. Boost will make these coatings stick to almost anything.
I own a game store and someone (my wife) made a joking comment about castle walls and well...I'm building castle walls. My worry is that part of my walls will be near a staircase and will be susceptible to customers poking, sitting and standing on my walls.
There are many ways of going about this. Check out our Foam Artist Gallery (especially the Holiday/Haunt section).
What most foam sculptors do is carve exaggerated shapes and grout-lines into the foam, especially in the recessed areas where the foam coat will most want to fill in. Apply a thin coat for looks where the foam walls won't be touched. Apply a thicker coat (like, 1/4") where it will be touched. And even thicker (up to 1/2" where people will be walking on it. Where people will be jumping on it, and along any seams and corners, you might want to use Mesh.
Applying multiple thin coats and using a hopper gun will greatly help retain detail. Start at one end and by the time you get to the other end you can spray the first end again. Keep repeating this process until the foam coat is as thick as you want it.
If you are brushing it on use a big stucco brush. I like to apply a thin scratch coat with Boost mixed in to start things out as this will give the next thicker coat something to grab onto. Since Boost strengthens the foam coat you don't have to put the foam coat on as thick, so it is useful in retaining detail.
All Purpose and Exterior Foam Coat are very forgiving to use and can be coated over and over, so you really can't go wrong.
I have been rinsing the All-Purpose foam coat in the sink as cleanup. Some has been drying in the bottom of a sink and I'm sure it isn't great for the pipes, but I also don't want to dump it outside. What is your recommendation for cleaning up tools/vessels?
The ingredients of our Create Coat, All Purpose and Exterior Foam Coatings are inert. Clumps should be left to harden then put in with the normal trash. You can rinse your tools/vessels in the sink. You might want to flush with soapy water to be safe.
How do I get a smooth finish with All Purpose Foam Coat?
You are best off applying a thin finish-coat and smoothing it after it sets up, but before it dries. If it's flat, you can use a concrete trowel to get a perfectly smooth and even polished surface. If it's contoured, I use one of the silicon spill guards that are used for pouring paint.
Adding less liquid will allow you to more easily texturize the surface. Likewise, adding more liquid will allow you to create a smoother surface. Tapping or vibrating the object you coat before it sets up re-liquefies the Foam Coat allowing it to fill in small blemishes like brush strokes.
Hi! How on Earth do you get it smooth?! This is horrible! I applied a thin layer, waited 20 mins to set. It is hard as a rock, no sand paper works on it and the one that does, gets it off completely of the foam. The whole project is ruined. WEEKS OF WORK!
You are best off applying a thin second finish-coat and smoothing it after it sets up, but before it dries. If it's flat, you can use a concrete trowel to get a perfectly smooth and even polished surface. If it's contoured, I use one of the silicon spill guards that are used for pouring paint. You can also tap your foam object while the foam coat is still fairly wet, and it will liquefy for an instant, smoothing small imperfections like brush marks. You can add up to 50% latex paint to your water to slow the setup and drying time. It does take some practice, but don't despair, we have many thousands of All Purpose Foam Coat users who began just like you. You're right, it is hard as rock once dry. I am able to smooth the surface using a 100 grit aluminum oxide sandpaper. If you have some heavy sanding you can use a flapper disc on a grinder.Product Rating
Customer Reviews
I just did a bunch of eps carved flowers that I coated with "foam coat" from the "Hot wire Foam Factory"
I think this material is similar to the hydro-cal material. I'm not sure exactly what their recipe is. They have a fortifier additive as well as another additive that created a more flexible surface.
I found it worked quite well. I used latex paint as the liquid ingredient. The nice thing about this is that you can create a recipe that is a little stiffer or thinner as needed.
The product adhered quite well to the eps foam, and stuck well to the board we where finishing on.
The latex paint gave us a longer working time, which seemed to be around the 45 to 60 min time depending upon the mixture.
It does say that you can sand this product, but found it to be difficult to sand by hand. We did not require the finish to be sanded, so I didn't spend allot of time trying to smooth the finish in this way. They did mentions a tapping technique that worked well at leveling the product.
Correspondence with the company was very prompt and helpful. I was doing the coating on a Saturday and Sunday, and they returned my e-mails even on the weekend. Instructions for mixing and application where very straight forward, and the website offered good tips for use.
Georgiana Nedelcu, 11-08-2014
Thank you. That makes sense. I would also like to tell you how much I love your company and products.
Sincerely,
Georgiana Nedelcu
Art Conservator Universal Fine Art Conservation, Estill, SC
Melanie Richard: Producer of Foam Gone Wild DVD, 04-08-2015
I have done foam sculpting for over a decade and nothing revolutionized my work more than Hot Wire Foam Factory's basic hot knife sculpting tools and All Purpose Foam Coat. I have found Foam Coat to be easy to use and the ideal way to simply create a variety of textures while giving strength and durability to my creations. It can be mixed thick or thin depending on the need and accepts paint very well. I have used it successfully with objects such as branches, fossils, grass, etc. embedded as decorative elements.
One of my clients is a zoo where I create naturalistic elements such as rock and tree sculptures. After discovering Foam Coat I was able to create interesting environments for the animals in the indoor exhibits instead of just the outside decorative work. This made for a more immersive experience for the guests and an interesting environment for the animals. A stone worker, there for a visit, warned that the "rock" over the glass was too heavy and would stress the glass too much!
Since I also create dinosaurs for a fossil museum I really appreciate the fact that I can make creations in sections and after transport I can blend the parts together seamlessly since the product will blend wet on dry with little effort. Just a bit of wet brushing does the trick. It appears not only seamless but provides the necessary strength and rigidity to support a large sculpture.
Multiple times I have had clients tell me they'd like an interior wall to look like natural rock, but can't afford to have it done. I have shown then how to create the look for very little effort and money using All Purpose Foam Coat.
Melanie Richard, Montana
John Flanagan - TJ Media Ent., 07-18-2016
Having been in the stage prop business for more than 30 years and using other coatings we tried your Foam Coat and While the foam coat powder mixes well, and is easy enough to apply I have found that after it dries it does not sick very well to the Owens Corning FOAMULAR 250
2" in.Extruded Polystyrene (XPS) Rigid Foam board and where it is a bit thin turns to a dusty powder when dried for 48 hours...?
Tina Padziora, 12-31-2016
My company Fantasy WaterWorkz does indoor/outdoor above/below ground ponds & waterfalls. what makes my creations different is I start with a base of Styrofoam. YES I said Styrofoam. You know the stuff with the breathable holes in it! I was going to use plaster to coat it but decided to try this Foam Coat. I was IMPRESSED!! It applied easily to the styrofoam and gave me a finished product that was more stable and harder than plaster. This company's products are a must try for any project!!
Jim Clouse, 12-28-2015
I've used All Purpose Foam Coat extensively for several years. I make display BattleBoards (display boards) for toy soldier collectors. I create the the boards out of construction grade foam board. But without coating them, the boards can be susceptible to nicks and dings. With foam coat the boards are much more durable and less likely to be dinged. As a side benefit, Foam Coat provides some additional texture to terrain features. I highly recommend this product!
Egg Sisters Cosplay, 10-10-2016
We have been building props and costumes for about 4 years. We use a variety of materials including EVA foam and pink insulation foam on many of our projects.
A problem with using pink insulation foam is that it is very fragile and many paints and adhesives eat through it. Once the foam is sealed with All Purpose Foam Coat, the foam has additional strength and is now safe to paint and sand.
We built a large 10' tall Reinhardt axe (From the game Overwatch) out of insulation foam and were able to keep it light weight and add durability by using the Foam Coat.
We liked that you could mix as much or as little water into the Foam Coat in order to patch dents and imperfections in the foam. We also liked that we could sand the foam coat to get a smooth finish before painting. We will certainly be using this product again in future projects!
Dee Rock, 12-12-2017
After completing my project, I'm still not sure how to use the Foam Coat. I did experiment with a couple of different consistencies. At first I thought it was necessary to apply before painting, but I found I could paint the foam without the foam coat. I also expected to use it to smooth out some rough spots, but I haven't quite developed the right technique yet.
Adam Lawrence, 08-26-2018
The staff at HWFF were very helpful and went out of their way to make my job easy.
Thank you!
James west, 01-23-2019
Awesome stuff works really well
Daniel Demarest, 03-25-2019
Great stuff, thank you!